What is Tuxedo Cheesecake? This delightful dessert, known for its elegant layers of chocolate and white cheesecake, has captured the hearts of dessert lovers everywhere.
But have you ever wondered where this rich, decadent cheesecake originated? Let’s dive into the history and evolution of the Tuxedo Cheesecake, exploring how it became a staple in many homes and bakeries.
A Brief History of Cheesecake
Cheesecake, in its many forms, has been enjoyed by people for centuries. The ancient Greeks were among the first to create a form of cheesecake, using simple ingredients like cheese, honey, and wheat.
Fast forward to the modern era, cheesecake has evolved into various styles, with New York-style cheesecake being one of the most popular. But the Tuxedo Cheesecake? This luxurious dessert is a relatively recent innovation, blending the richness of chocolate with the creamy texture of classic cheesecake.
What is Tuxedo Cheesecake Made Of?
The Tuxedo Cheesecake likely emerged in the late 20th century, inspired by the visual appeal of the classic black and white tuxedo.
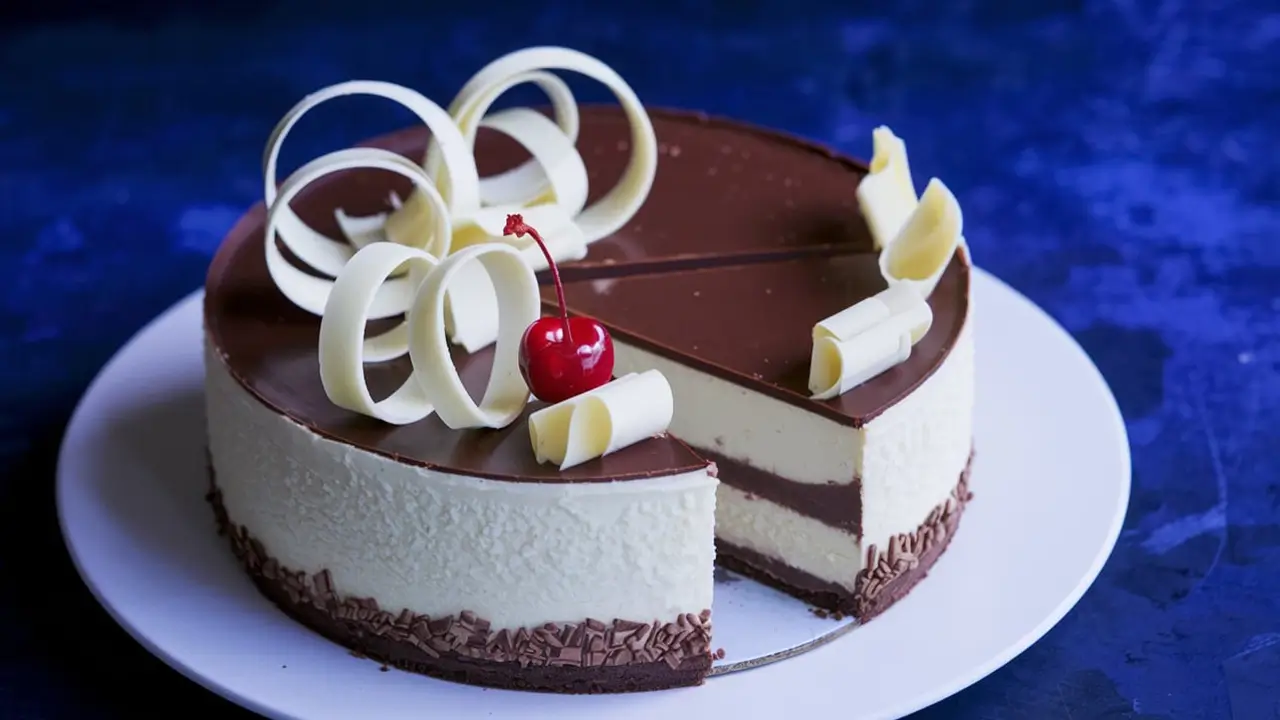
The idea was simple yet brilliant: layer a dark chocolate cheesecake with a creamy white chocolate cheesecake, and you have a dessert that mirrors the elegance of a tuxedo. This cheesecake quickly gained popularity in high-end restaurants and bakeries, becoming a go-to dessert for special occasions.
The name “Tuxedo” itself conjures images of sophistication and class, and this cheesecake certainly lives up to that reputation. Its layered appearance and rich flavors make it a show-stopping dessert that’s perfect for celebrations.
Cultural Significance of Tuxedo Cheesecake
Today, the Tuxedo Cheesecake is more than just a dessert; it’s a symbol of celebration and indulgence. Whether served at weddings, anniversaries, or upscale dinner parties, this cheesecake adds a touch of elegance to any event. Its popularity has even spread beyond American borders, with variations found in European and Asian bakeries.
Moreover, the versatility of this dessert allows for countless variations, from adding fruit toppings to experimenting with different types of chocolate. This adaptability has helped Tuxedo Cheesecake maintain its status as a beloved treat around the world.
The Components of Tuxedo Cheesecake
Now that we’ve uncovered the rich history of Tuxedo Cheesecake, it’s time to dive into what makes this dessert truly special—the ingredients. Understanding each component is key to mastering the recipe and achieving that perfect blend of flavors and textures.
The Oreo Crust: A Crunchy Foundation
Every great Tuxedo Cheesecake begins with a solid foundation, and in this case, it’s an Oreo crust. This crust provides the perfect crunchy contrast to the creamy layers above.
- Ingredients: The Oreo crust is made from crushed Oreo cookies, with the filling included, and melted butter. These ingredients are combined and pressed into the bottom of a springform pan to create a firm base.
- Preparation Tips: For the best results, crush the cookies finely, either using a food processor or by placing them in a sealed bag and crushing them with a rolling pin. Mix in just enough melted butter to bind the crumbs together, ensuring the crust holds its shape but isn’t too greasy.
This crunchy, chocolatey base not only supports the cheesecake but also adds an irresistible flavor that complements the layers above. The crust is the first step to creating that perfect Tuxedo look—dark and elegant, just like the dessert itself.
The Cheesecake Layers: A Match Made in Heaven
The star of the show is undoubtedly the cheesecake layers, which consist of both dark chocolate and white chocolate cheesecake. These layers are where the magic happens, creating a harmonious balance between rich chocolate and creamy cheesecake.
- Dark Chocolate Cheesecake: This layer is made from a blend of cream cheese, sugar, eggs, vanilla, and melted dark chocolate. The chocolate gives it a deep, rich flavor that contrasts beautifully with the lighter layers.
- White Chocolate Cheesecake: In contrast, the white chocolate layer is made with cream cheese, sugar, eggs, and melted white chocolate. This layer is smoother and slightly sweeter, providing a delightful balance to the dark chocolate layer.
The key to perfect layers? Make sure each layer sets properly before adding the next. This not only ensures a clean, distinct look but also allows the flavors to meld together just right.
The Ganache Topping: A Decadent Finish
No Tuxedo Cheesecake is complete without a luscious ganache topping. This rich layer of chocolate seals the deal, adding an extra touch of indulgence.
- Ingredients: The ganache is made from high-quality dark chocolate and heavy cream. Some variations might add a touch of vanilla or espresso to enhance the flavor, but the classic version keeps it simple with just chocolate and cream.
- Preparation Tips: The key to a smooth ganache is to heat the cream until just simmering and then pour it over the chopped chocolate. Let it sit for a minute before stirring, allowing the chocolate to melt evenly. Once smooth, the ganache can be poured over the cheesecake, spreading it gently to create a glossy, beautiful finish.
This topping isn’t just for looks; it adds a final burst of chocolate flavor that ties the whole dessert together. Plus, it gives the cheesecake that signature tuxedo appearance—dark, glossy, and utterly irresistible.
Step-by-Step Preparation
Ready to transform those ingredients into a mouthwatering Tuxedo Cheesecake? Let’s roll up our sleeves and get baking. In this part, I’ll walk you through each step of the process, ensuring you achieve that perfect layered masterpiece.
Preparing the Crust
The foundation of your cheesecake begins with the Oreo crust. This step is crucial for setting the stage for the layers to come.
- Crush the Oreos: Start by finely crushing about 24 Oreo cookies (cream and all) into crumbs. You can use a food processor for ease, but a sealed bag and rolling pin work just as well.
- Mix with Butter: Combine the crumbs with 5 tablespoons of melted butter.
- Form the Crust: Press this mixture into the bottom of a 9-inch springform pan, ensuring an even layer. You can use the bottom of a glass to press it firmly and evenly into place.
- Bake: Preheat your oven to 350°F (175°C) and bake the crust for about 10 minutes. This step sets the crust and gives it a slight crispiness, preventing it from becoming soggy once the cheesecake layers are added.
Now that your crust is ready and cooling, let’s move on to the cheesecake layers. The trick here is patience and precision, as these layers are what give the Tuxedo Cheesecake its distinctive look and taste.
Preparing the Cheesecake Layers
Dark Chocolate Layer
- Melt the Chocolate: Start by melting 4 ounces of bittersweet chocolate. You can do this in a microwave, heating it in 30-second intervals and stirring in between until smooth.
- Mix Cream Cheese and Sugar: In a large bowl, beat 16 ounces of cream cheese with ½ cup of sugar until smooth and creamy. Add 2 eggs, one at a time, mixing well after each addition.
- Combine Ingredients: Add in 1 teaspoon of vanilla extract and the melted chocolate. Mix until fully incorporated and smooth.
- Pour and Bake: Pour this mixture over the baked Oreo crust. Place the springform pan in a water bath to prevent cracking and bake at 325°F (163°C) for about 40-45 minutes, or until the center is just set.
White Chocolate Layer
- Melt the White Chocolate: Melt 4 ounces of white chocolate in the same way you did the dark chocolate.
- Mix the Ingredients: In another bowl, beat 16 ounces of cream cheese with ½ cup of sugar until smooth. Add 2 eggs, one at a time, then stir in 1 teaspoon of vanilla extract and the melted white chocolate.
- Pour and Bake: Once the dark chocolate layer has cooled slightly, pour the white chocolate mixture on top. Bake at 325°F (163°C) for another 40-45 minutes, until the edges are set and the center has a slight jiggle.
Pro Tip: Always allow the cheesecake to cool slowly in the oven with the door slightly ajar. This prevents sudden temperature changes that can cause cracks.
Assembling the Cheesecake
Now that both layers are baked and cooled, it’s time to assemble the final touches. The assembly process not only ensures the layers stay intact but also adds the finishing touch that makes this cheesecake truly special.
- Cool Completely: After baking, let the cheesecake cool to room temperature before placing it in the refrigerator for at least 4 hours, preferably overnight. This allows the layers to firm up.
- Prepare the Ganache: To make the ganache, heat ½ cup of heavy cream until just simmering. Pour it over 4 ounces of chopped dark chocolate and let it sit for a minute before stirring until smooth.
- Pour Over Cheesecake: Remove the chilled cheesecake from the springform pan and place it on a serving platter. Pour the ganache over the top, allowing it to drip down the sides for an elegant finish.
- Optional Decorations: You can top the cheesecake with chocolate curls or shavings for a more decorative look.
Variations and Serving Suggestions
Now that you’ve mastered the classic Tuxedo Cheesecake, why not take it a step further? This dessert is already a showstopper, but with a few tweaks and creative touches, you can elevate it even more. Let’s explore some delightful variations and serving suggestions that will leave your guests asking for seconds!
Flavor Variations: Endless Possibilities
While the traditional Tuxedo Cheesecake is a perfect blend of dark and white chocolate, there’s plenty of room for experimentation. Here are a few ideas to inspire your creativity:
- Raspberry Tuxedo Cheesecake: Add a layer of raspberry jam or fresh raspberries between the chocolate layers. The tartness of the raspberries complements the richness of the cheesecake, adding a refreshing twist.
- Salted Caramel Tuxedo Cheesecake: Drizzle salted caramel sauce over the top of the cheesecake before adding the ganache.
- Nutty Tuxedo Cheesecake: Sprinkle chopped nuts, like hazelnuts or almonds, between the layers or over the ganache for a crunchy texture that adds both flavor and visual appeal.
These variations not only add new dimensions to the flavor but also offer a personalized touch that can cater to different palates. Experimenting with these ideas is a fun way to make the cheesecake uniquely yours.
Presentation Ideas: Make It a Visual Feast
Presentation matters, especially with a dessert as elegant as Tuxedo Cheesecake. Here are some suggestions to ensure your cheesecake looks as good as it tastes:
- Chocolate Curls and Shavings: Use a vegetable peeler to create chocolate curls from a chocolate bar. Scatter these over the top for a simple yet sophisticated look.
- Edible Gold Leaf: For an ultra-luxe presentation, consider adding a touch of edible gold leaf to the top of the cheesecake. This small addition can make your dessert feel fit for a royal occasion.
- Layered Presentation: If you’re serving the cheesecake at a large event, consider making mini Tuxedo Cheesecakes in individual jars. Layer the crust, dark chocolate cheesecake, white chocolate cheesecake, and ganache in small mason jars for a portable, mess-free dessert that’s perfect for parties.
These presentation ideas not only enhance the visual appeal but also add a touch of personalization that guests will appreciate. Remember, the first bite is always with the eyes, so make it count!
Pairing Suggestions: Complementing Flavors
The rich and creamy nature of Tuxedo Cheesecake pairs wonderfully with a variety of beverages and side treats. Here are a few pairing ideas to elevate your cheesecake experience:
- Coffee or Espresso: The bitterness of coffee perfectly balances the sweetness of the cheesecake, making it a classic pairing choice.
- Tea: A cup of Earl Grey or Darjeeling tea can complement the chocolate flavors without overpowering them, providing a more subtle accompaniment.
- Hot Chocolate: For an indulgent experience, serve the cheesecake with a cup of rich, homemade hot chocolate. The combination of different chocolate intensities is sure to satisfy any chocolate lover.
- Ice Cream: A scoop of vanilla or raspberry sorbet on the side can add a refreshing contrast to the rich flavors of the cheesecake.
These pairing suggestions are designed to enhance the overall experience of enjoying Tuxedo Cheesecake, whether you’re serving it as a dessert after a meal or as a centerpiece at a special occasion.
Frequently Asked Questions
As you embark on your journey to make the perfect Tuxedo Cheesecake, you might encounter a few bumps along the way. But don’t worry! This section addresses some of the most common questions and concerns, providing you with the tips and tricks needed to achieve cheesecake perfection.
How to Store Tuxedo Cheesecake?
Storing your Tuxedo Cheesecake properly is essential for maintaining its freshness and flavor. Here’s how you can keep it in prime condition:
- Refrigeration: After your cheesecake has cooled to room temperature, cover it tightly with plastic wrap or aluminum foil and store it in the refrigerator. Pro tip: If you want to prevent the cheesecake from absorbing other odors in the fridge, you can place it in an airtight container.
- Freezing: If you need to store the cheesecake for a longer period, freezing is a great option. Wrap the cheesecake tightly in plastic wrap, followed by a layer of aluminum foil. It can be stored in the freezer for up to 2 months. When you’re ready to enjoy it, thaw the cheesecake in the refrigerator overnight.
Proper storage ensures that your cheesecake remains as delicious as the day you made it, whether you’re saving it for later in the week or planning ahead for a special occasion.
Can Tuxedo Cheesecake Be Made Ahead?
Absolutely! Tuxedo Cheesecake is a perfect make-ahead dessert. In fact, making it ahead can enhance its flavors as it allows the layers to meld together beautifully.
- Make Ahead Tips: You can prepare the entire cheesecake a day or two in advance. Follow the storage instructions mentioned above, keeping it refrigerated until you’re ready to serve. If you’re planning to freeze it, just remember to thaw it slowly in the refrigerator the night before you plan to serve it.
Making the cheesecake ahead of time not only reduces stress on the day of your event but also ensures that the cheesecake is set and ready to impress your guests.
What Are Common Mistakes When Making Tuxedo Cheesecake?
Here are some common mistakes to watch out for when making Tuxedo Cheesecake, along with tips on how to avoid them:
- Cracks in the Cheesecake: One of the most common issues is cracking. This can happen if the cheesecake is overbaked, or if it cools too quickly. To prevent this, always bake your cheesecake in a water bath and allow it to cool gradually in the oven with the door slightly ajar.
- Soggy Crust: If your Oreo crust turns out soggy, it might be because the crumbs weren’t packed tightly enough or the crust wasn’t pre-baked. Ensure that the crumbs are well-packed and bake the crust for 10 minutes before adding the cheesecake layers.
- Layer Separation: Sometimes the layers can separate if they haven’t been set properly before adding the next layer. Make sure each layer is fully set and cooled before adding the next to maintain that beautiful tuxedo effect.
Understanding these common pitfalls can save you time and frustration, ensuring that your cheesecake turns out perfectly every time.
We’ve covered a lot of ground in answering these frequently asked questions. Armed with these tips, you’re now better prepared to handle any challenges that come your way when making Tuxedo Cheesecake. But there’s always more to learn!
Next up, we’ll explore how to personalize your cheesecake even further, with a deep dive into flavor variations and creative presentations. Let’s keep the cheesecake magic going!
Troubleshooting and Expert Tips
As you refine your skills in making Tuxedo Cheesecake, it’s essential to know how to troubleshoot common issues and apply expert tips that can elevate your baking game. This part of the guide will cover the intricacies that can make or break your dessert, ensuring you achieve bakery-quality results every time.
Troubleshooting Common Issues
Even with the best preparation, things can sometimes go awry in the kitchen. Let’s tackle a few more challenges you might face and how to overcome them.
- Dry Cheesecake: If your cheesecake turns out dry, it’s often due to overbaking. Remember, the cheesecake should still have a slight jiggle in the center when you take it out of the oven. It will continue to set as it cools. Also, consider using a water bath to maintain moisture.
- Overmixed Batter: Overmixing can incorporate too much air into the batter, leading to cracks or a dense texture. For best results, use a paddle attachment on a stand mixer at medium speed, and scrape down the sides of the bowl periodically.
- Lumpy Cheesecake: Lumps in your cheesecake can result from cold ingredients. Always use room-temperature cream cheese and eggs, and beat them until smooth before adding other ingredients. If you do find lumps, pass the batter through a fine sieve to smooth it out.
Understanding these troubleshooting tips helps you to anticipate and address issues before they ruin your dessert. It’s all about technique and patience!
Expert Tips for a Perfect Tuxedo Cheesecake
To take your Tuxedo Cheesecake from good to great, here are some expert tips that professional bakers swear by:
- Use High-Quality Ingredients: The quality of your ingredients, especially the chocolate and cream cheese, will directly impact the flavor and texture of your cheesecake. Opt for high-quality dark and white chocolate, and full-fat cream cheese for the best results.
- Room Temperature Ingredients: As mentioned earlier, room temperature ingredients blend more smoothly, resulting in a creamier cheesecake. Take the time to let your cream cheese, eggs, and chocolate come to room temperature before starting.
- Perfect the Water Bath: To avoid cracks, bake your cheesecake in a water bath. Wrap the outside of your springform pan with two layers of heavy-duty aluminum foil to prevent water from seeping in. Place the pan in a larger roasting pan and fill it with hot water, about halfway up the sides of the springform pan.
- Chill for the Right Time: After baking, the cheesecake needs time to chill and set. Ideally, let it chill in the refrigerator for at least 4 hours, but overnight is even better. This ensures the layers are fully set, making slicing and serving much easier.
- Sharp Knife for Slicing: For clean, sharp slices, use a long, sharp knife and wipe it clean between cuts. This prevents any mix of the layers and ensures each slice looks as good as it tastes.
Applying these expert tips can make a significant difference in the outcome of your cheesecake, helping you achieve that professional finish that’s sure to impress.