
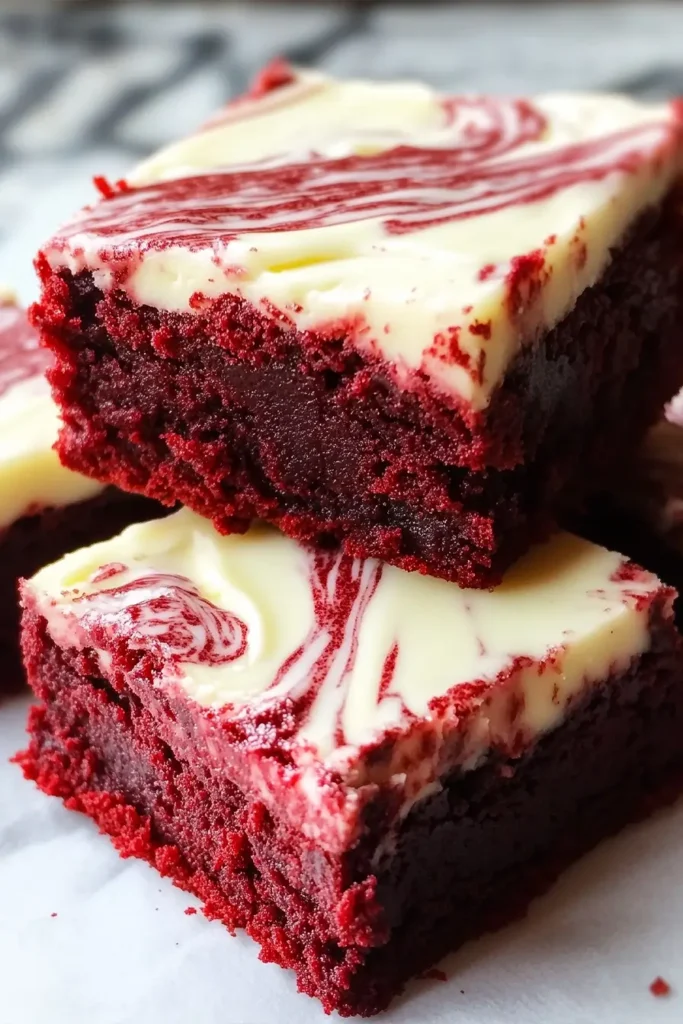
I’ve always had a soft spot for anything red velvet, and these Red Velvet Brownies take that love to a whole new level.
There’s just something about that deep red color and the rich, slightly tangy flavor that makes me think of special moments, like family birthdays or holiday gatherings when the house is filled with laughter and the smell of something sweet baking in the oven.
These brownies are no different. They bring that perfect balance of velvety chocolate with a hint of cream cheese swirl, making each bite a little slice of comfort.
I remember the first time I made these for a weekend get-together. They were an instant hit—gooey, fudgy, and just the right amount of sweetness.
They disappeared faster than I could even put them on the serving plate!
Why You’ll Love This Red Velvet Brownies
There’s so much to love about these Red Velvet Brownies—I make them whenever I want something easy but impressive.
First of all, the flavor is a dream! You get that deep, chocolatey richness with just a hint of tang from the red velvet, and the cream cheese swirl on top? It adds the perfect creamy touch without being too heavy.
What I love most is how simple they are to prepare. I’ve whipped these up for last-minute gatherings more times than I can count, and they always turn out perfectly. Plus, they’re versatile—you can serve them as is, or dress them up with a scoop of vanilla ice cream if you’re feeling fancy.
These brownies are like a warm hug—they remind me of baking with my kids on lazy Sunday afternoons. They’re that kind of comforting treat everyone keeps reaching for, whether it’s for a party or just a quiet evening at home.
If these easy and delicious Red Velvet Brownies hit the spot, you’ll definitely want to check out our tasty Milk Chocolate Stuffed Jack-O’-Lantern Cookies and irresistible Fudgy Chocolate Brownie Cookies!
Ingredients for Red Velvet Brownies
Here’s what you’ll need to make these Red Velvet Brownies, and I promise, most of this you probably already have in your pantry!
The ingredients are simple, but they work together to create something so special. I love how this recipe doesn’t require anything fancy, yet the results feel like you’ve made something extraordinary.
For the brownies
- Butter (1/2 cup, melted): I always recommend using real butter for that rich, indulgent flavor. If you’re dairy-free, you can swap in a plant-based butter substitute, and it still works like a charm.
- Granulated sugar (1 cup): Just regular white sugar gives the brownies that perfect sweetness. If you’re watching your sugar intake, you can use a lower-sugar alternative, but it might change the texture slightly.
- Eggs (2 large): This helps make the brownies nice and fudgy. Room-temperature eggs blend better with the rest of the ingredients.
- Vanilla extract (1 tsp): A little splash goes a long way in boosting the flavor. I like to use pure vanilla extract for the best taste, but the imitation kind will work in a pinch.
- Red food coloring (1 tbsp): This gives the brownies that classic red velvet look. You can use gel food coloring for a more intense color, or leave it out entirely if you prefer a more natural hue.
- Cocoa powder (2 tbsp): You don’t need a lot, but this is what gives the brownies their chocolatey goodness. I use unsweetened cocoa powder.
- All-purpose flour (3/4 cup): Regular flour works great here, but if you need a gluten-free option, just substitute with a 1:1 gluten-free flour blend.
- Baking powder (1/2 tsp): This helps the brownies rise just a bit so they’re not too dense.
- Salt (1/4 tsp): A little pinch balances out the sweetness and brings out the flavors.
For the cream cheese swirl
- Cream cheese (4 oz, softened) adds a dreamy, creamy element. Make sure it’s softened so it blends easily.
- Sugar (1/4 cup): Just a touch to sweeten the cream cheese swirl.
- Egg yolk (1 large): This helps the cream cheese mixture set perfectly on top of the brownies.
- Vanilla extract (1/2 tsp): Another little splash of vanilla to tie it all together.
I love how these ingredients combine to create a rich and comforting dish. And if you’re missing something, don’t stress! You can easily make little tweaks, which will still turn out delicious.
How to Make Red Velvet Brownies
These red velvet brownies are super easy to make, and it’s one of those recipes you can just throw together in no time-perfect for when you want something special without having to spend a lot of time in the kitchen.
Here’s how I like to do it:
1. Preheat your oven: Set your oven to 350°F (175°C) and grease an 8×8-inch baking pan. Lining it with parchment paper makes it easier to lift the brownies out once they’re done—less mess and perfect edges!
2. Prepare the brownie batter: In a medium-sized bowl, melt 1/2 cup of butter and let it cool slightly. Stir in 1 cup of sugar until well combined. Then, mix in 2 eggs and 1 teaspoon of vanilla extract until smooth and creamy.
Next, add 2 tablespoons of cocoa powder, 3/4 cup of flour, 1/2 teaspoon of baking powder, and 1/4 teaspoon of salt. Stir until just combined—be careful not to overmix. Finally, mix in 1 tablespoon of red food coloring to achieve that signature red velvet look.
3. Make the cream cheese swirl: In a separate small bowl, beat together 4 oz of softened cream cheese, 1/4 cup of sugar, 1 egg yolk, and 1/2 teaspoon of vanilla extract until smooth.
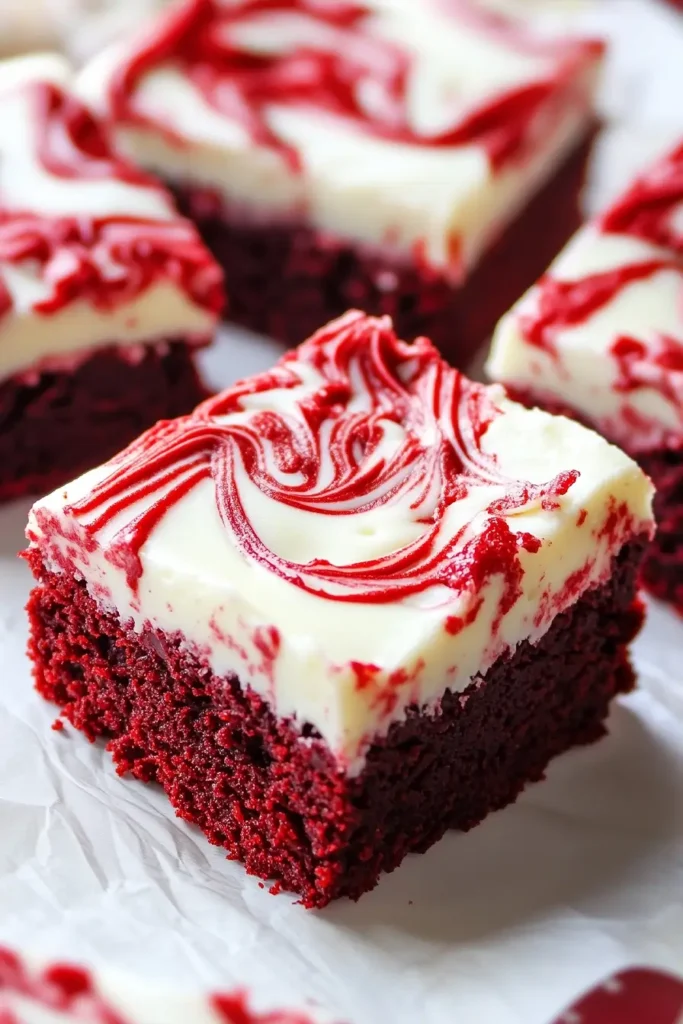
4. Assemble the brownies: Pour the red velvet batter into the prepared baking pan and spread it evenly. Spoon the cream cheese mixture on top in dollops, then gently swirl it into the red velvet batter using a knife or toothpick to create pretty swirls.
5. Bake: Bake the brownies for 25-30 minutes, or until a toothpick inserted into the center comes out with a few moist crumbs. Check around the 25-minute mark to avoid overbaking. The brownies should be slightly fudgy in the middle.
6. Cool and enjoy: Let the brownies cool in the pan for about 10 minutes before lifting them out using the parchment paper. Slice them up while still slightly warm or let them cool completely for cleaner cuts. Enjoy their rich, fudgy texture with the perfect cream cheese swirl!
Loved making these delicious Red Velvet Brownies? You can find the complete printable recipe just below.
Can I make these Red Velvet Brownies ahead of time?
Absolutely! These brownies are perfect for making a day or two in advance.
In fact, I’ve found that they taste even better the next day because the flavors have a chance to meld together.
Just be sure to store them in an airtight container at room temperature. If you want to keep them longer, you can pop them in the fridge for up to a week, but I promise—they never last that long in my house!
Don’t miss out! Follow us on Facebook for exclusive recipes and fun cooking tips!
What if I don’t have red food coloring?
No worries! If you don’t have red food coloring, you can still make these brownies and enjoy their delicious flavor.
They’ll just be more of a chocolate brownie with a hint of that classic red velvet tang. I’ve skipped the red food coloring before when I was out, and no one complained.
If you’re looking for a more natural alternative, beet powder can be used, though it will give a more muted red color.
Print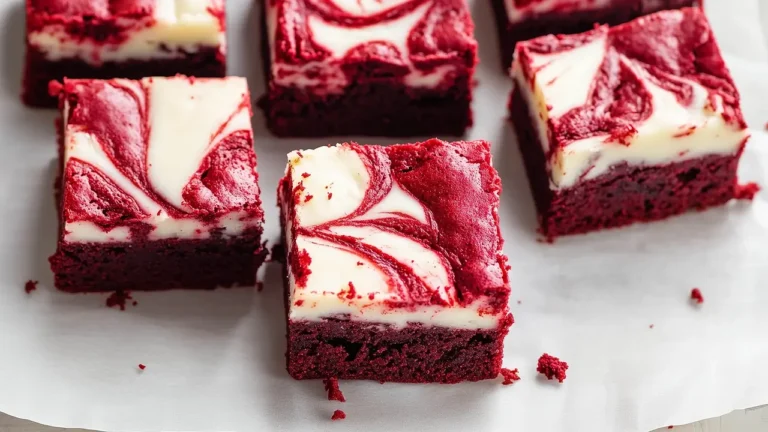
The Best Red Velvet Brownies
Rich, fudgy Red Velvet Brownies with a signature tangy cream cheese swirl. These brownies combine the deep flavor of chocolate with the velvety smoothness of red velvet cake, making them a perfect treat for any occasion.
- Total Time: 40-45 minutes
- Yield: 16 brownies
Ingredients
For the Brownies
- Butter (½ cup, melted): Real butter adds richness, but you can use a plant-based substitute if you’re dairy-free.
- Granulated sugar (1 cup): Regular white sugar gives perfect sweetness; a lower-sugar alternative may slightly affect texture.
- Eggs (2 large): Room-temperature eggs for a fudgy texture.
- Vanilla extract (1 tsp): Use pure vanilla extract for best flavor.
- Red food coloring (1 tbsp): Gel food coloring offers an intense hue, but it’s optional.
- Cocoa powder (2 tbsp): Unsweetened cocoa for a rich, chocolatey flavor.
- All-purpose flour (¾ cup): Regular or a 1:1 gluten-free blend works here.
- Baking powder (½ tsp): Helps the brownies rise slightly for a perfect balance between dense and fluffy.
- Salt (¼ tsp): Enhances the sweetness and flavors.
For the Cream Cheese Swirl
- Cream cheese (4 oz, softened): Adds a creamy, dreamy element; ensure it’s softened for easy blending.
- Sugar (¼ cup): Just a touch for sweetness.
- Egg yolk (1 large): Helps set the cream cheese swirl perfectly on the brownies.
- Vanilla extract (½ tsp): Ties together the flavors.
Instructions
- Preheat oven to 350°F (175°C). Line an 8×8 inch baking pan with parchment paper.
- In a large bowl, mix melted butter and sugar until combined.
- Add eggs and vanilla extract, whisking until smooth.
- Stir in red food coloring and cocoa powder, ensuring the mixture is well-blended.
- Fold in flour, baking powder, and salt, mixing just until combined.
- Pour half of the brownie batter into the prepared pan, smoothing it out with a spatula.
- In a separate bowl, mix the softened cream cheese, sugar, egg yolk, and vanilla until smooth.
- Drop spoonfuls of the cream cheese mixture over the brownie batter in the pan. Pour the remaining brownie batter over the top.
- Use a knife to gently swirl the cream cheese into the brownie batter, creating a marbled effect.
- Bake for 25-30 minutes, or until a toothpick inserted into the center comes out with a few moist crumbs.
- Let the brownies cool completely before slicing and serving.
Notes
- For more intense color, use gel food coloring.
- Substitute gluten-free flour if needed.
- Allow the brownies to cool completely before cutting for clean slices.
Nutrition
- Calories: 250
- Sugar: 18g
Can I freeze Red Velvet Brownies?
Yes, you can definitely freeze these brownies! I usually bake a double batch and freeze half for later—just wrap them tightly in plastic wrap or aluminum foil and store them in a freezer-safe container. They should be kept for about 2-3 months.
When you’re ready to enjoy them, just thaw them at room temperature, and they’re just as fudgy and delicious as when they were freshly baked.
It’s always nice to have a sweet treat waiting in the freezer for those unexpected cravings!
Serving Suggestions
When it comes to serving these Red Velvet Brownies, the possibilities are endless! I love to warm them slightly and pair them with a scoop of vanilla ice cream or a dollop of whipped cream. The contrast between warm and cold is simply heavenly!
If you’re feeling a bit indulgent, drizzle some chocolate or cream cheese frosting on top for an extra special touch.
I also like to serve these brownies at family gatherings with a side of fresh berries, their tartness balances the sweetness beautifully.
Whenever I make them, I usually brew a pot of rich coffee or a cozy cup of hot cocoa. It just feels like the perfect way to enjoy a sweet treat with loved ones, creating those warm memories that linger long after dessert is finished.