When we talk about luxury chocolate, Godiva Chocolate Cheesecake or Godiva is a name that instantly resonates with connoisseurs around the world. Since its inception in Belgium in 1926, Godiva has established itself as a brand synonymous with quality, indulgence, and a rich chocolate legacy.
But Godiva’s influence extends beyond just chocolate bars and truffles; it’s also made a mark in the world of desserts—especially in the realm of chocolate cheesecakes.
The Legacy of Godiva Chocolates
Godiva began as a small family-run chocolate shop in Brussels, created by Joseph Draps. He named the brand after the legendary Lady Godiva, and over time, Godiva grew into an internationally recognized symbol of fine chocolates. The brand’s commitment to using high-quality ingredients, coupled with innovative recipes, has made it a beloved choice among chocolate enthusiasts. In fact, it’s hard to think of premium chocolates without Godiva coming to mind.
But what sets Godiva apart? Their dedication to perfection. Each piece of chocolate is crafted with precision, ensuring that every bite is a blend of rich, creamy textures and deep, satisfying flavors. It’s no surprise that their chocolates have found their way into other luxurious desserts, including the decadent Godiva Chocolate Cheesecake.
The Rise of Chocolate Cheesecake
Chocolate cheesecake is a dessert that has won the hearts of many, thanks to its rich and indulgent flavor profile. The origins of cheesecake itself date back to ancient Greece, where it was often served to athletes during the first Olympic Games. However, the version we know today, with its smooth texture and variety of flavors, has evolved significantly over centuries.
Enter Godiva chocolate. Combining the creamy, tangy goodness of cheesecake with the richness of Godiva chocolate creates a dessert that is nothing short of extraordinary. This fusion became a sensation, particularly in the United States, where cheesecake has always been a popular dessert.
The Godiva Chocolate Cheesecake, inspired by such luxury, quickly became a staple in many high-end restaurants and bakeries. Its success has led to countless variations, from homemade recipes to elaborate versions served at places like The Cheesecake Factory, known for their towering slices of indulgence.
The Influence of Godiva in Dessert Culture
The influence of Godiva in the dessert world, especially with chocolate cheesecake, is undeniable. The brand’s commitment to quality and luxury has ensured that any dessert bearing its name is associated with excellence. The Godiva Chocolate Cheesecake is a perfect example of how combining high-quality ingredients with innovative dessert-making techniques can create something truly special.
Traditional Godiva Chocolate Cheesecake Recipe
If you’re aiming to create the ultimate indulgence at home, look no further than the traditional Godiva Chocolate Cheesecake. This recipe combines the richness of Godiva’s premium chocolate with the creamy, tangy goodness of cheesecake, making for an unforgettable dessert experience.
Ingredients Breakdown
To begin, you’ll need to gather all your ingredients. The key to a perfect cheesecake is in the quality of its components. Here’s what you’ll need:
- Crust:
- 1 ¼ cups chocolate wafer crumbs (about 20-22 wafers)
- ¼ cup unsalted butter, melted
- 2 tablespoons granulated sugar
- Cheesecake Filling:
- 24 ounces cream cheese, softened (this ensures a smooth texture)
- 1 cup granulated sugar
- 4 large eggs, at room temperature
- 14 ounces Godiva 72% dark chocolate, divided (to maintain that signature Godiva richness)
- ¼ cup hot brewed coffee (to enhance the chocolate flavor)
- 1 teaspoon vanilla extract
- ¼ teaspoon salt
- Ganache Topping:
- 7 ounces Godiva dark chocolate, finely chopped
- ⅓ cup heavy cream
These ingredients are carefully selected to ensure that each bite of the cheesecake delivers the rich, deep flavors that Godiva is known for. Additionally, the coffee in the filling isn’t just an optional extra—it’s a secret weapon that intensifies the chocolate, giving it a deeper, more complex taste. If you’ve never tried adding coffee to chocolate, you’re in for a treat.
Recipe Variations for Every Preference
While the traditional Godiva Chocolate Cheesecake is a showstopper, there are plenty of variations to suit different tastes and dietary needs. Let’s explore a few popular alternatives:
- Instant Pot Godiva Chocolate Cheesecake:
- For those who are short on time or prefer the convenience of an Instant Pot, this variation is perfect. It’s faster, and you don’t have to worry about your cheesecake cracking—thanks to the consistent heat of the Instant Pot. The process involves mixing the same ingredients but cooking under pressure for about 35 minutes .
- No-Bake Godiva Chocolate Cheesecake:
- If you want a simpler, fuss-free version, a no-bake cheesecake is the way to go. It eliminates the need for baking entirely. Instead, the filling is chilled until set, creating a lighter, creamier texture that still packs a punch of Godiva’s signature chocolate flavor.
- Vegan Godiva Chocolate Cheesecake:
- For those who prefer a plant-based option, you can substitute the cream cheese with a vegan cream cheese alternative, and the heavy cream with coconut cream. The result is just as rich and satisfying, proving that you don’t need dairy to enjoy a luxurious cheesecake.
Each of these variations brings something unique to the table, whether it’s a quicker cooking time, a lighter texture, or a more inclusive approach for those with dietary restrictions. Exploring these options can help you find the perfect cheesecake recipe to suit any occasion.
Step-by-Step Guide to Making Godiva Chocolate Cheesecake
Preparing the Crust
For the Godiva Chocolate Cheesecake, a chocolate wafer crust provides a rich, crunchy contrast to the creamy filling. Here’s how to get it just right:
- Crush the Wafers: Start by crushing the chocolate wafers into fine crumbs. You can use a food processor for this, or simply place the wafers in a ziplock bag and crush them with a rolling pin. The goal is to achieve a uniform texture that will hold together well.
- Mix with Butter and Sugar: In a mixing bowl, combine the crushed wafers with melted unsalted butter and granulated sugar. The butter helps bind the crumbs together, while the sugar adds a touch of sweetness that balances the bitterness of the dark chocolate.
- Press into the Pan: Transfer the mixture to a springform pan, pressing it firmly into the bottom to create an even layer. Use the back of a spoon or the bottom of a measuring cup to ensure the crust is tightly packed. This step is crucial for preventing the crust from crumbling when sliced.
- Chill the Crust: Place the crust in the freezer for about 10-15 minutes while you prepare the filling. Chilling helps the crust set and makes it easier to handle when pouring in the cheesecake batter.
Key Tip: To avoid a soggy crust, make sure the butter has cooled slightly before mixing it with the wafer crumbs. Hot butter can make the crust greasy, which can lead to an undesirable texture.
Creating the Cheesecake Filling
Now comes the heart of the cheesecake—the filling. This is where the rich, creamy, chocolatey magic happens.
- Melt the Godiva Chocolate: Begin by melting the Godiva dark chocolate. You can do this in a double boiler or in the microwave using short bursts of heat. Stir until smooth and let it cool slightly before adding it to the mixture.
- Mix the Cream Cheese and Sugar: In a large mixing bowl, beat the softened cream cheese with granulated sugar until the mixture is smooth and fluffy. This step is important because it ensures that your cheesecake will have a smooth, creamy texture without any lumps.
- Add Eggs One at a Time: Incorporate the eggs one at a time, mixing at low speed to avoid incorporating too much air, which can cause cracks in the cheesecake during baking.
- Blend in the Chocolate and Flavorings: Gradually add the melted chocolate, followed by the hot brewed coffee, vanilla extract, and a pinch of salt. The coffee is key here—it enhances the flavor of the chocolate, making it even more intense and satisfying. Mix until everything is fully incorporated and the batter is smooth.
- Pour Over the Crust: Once the filling is ready, remove the crust from the freezer and pour the batter over it.
Important Consideration: Overmixing can lead to cracks in your cheesecake, so mix just until the ingredients are combined. Also, avoid using a high speed on your mixer to prevent incorporating too much air into the batter.
Baking Techniques and Tips
Baking a cheesecake can be tricky, but with a few tips, you can achieve that perfect, crack-free finish:
- Water Bath Method: One of the best ways to ensure an evenly baked cheesecake is to use a water bath. This method involves placing your springform pan inside a larger pan filled with hot water. The water bath adds moisture to the oven, which helps prevent the cheesecake from drying out and cracking.
- Alternative Methods: If a water bath sounds too cumbersome, you can achieve similar results by placing a pan of water on the lower rack of your oven. This won’t be as effective as a full water bath, but it will still help create a moist baking environment.
- Baking Time and Temperature: Bake the cheesecake at 325°F (163°C) for about 55-65 minutes, or until the edges are set but the center is still slightly jiggly. The cheesecake will continue to cook as it cools, so it’s better to underbake slightly than to overbake.
- Cooling: After baking, turn off the oven and let the cheesecake cool in the oven with the door slightly ajar for about an hour.
- Pro Tip: Resist the urge to open the oven door while baking.
Serving and Storing Godiva Chocolate Cheesecake
Perfect Presentation and Serving Suggestions
After all the effort that goes into making a Godiva Chocolate Cheesecake, you’ll want to present it in a way that does justice to its luxurious flavors. Presentation is key—not just for impressing guests, but also for making your own culinary experience feel special.
- Serving Temperature: It’s best to serve the cheesecake chilled, directly from the refrigerator. This allows the flavors to remain rich and the texture to stay firm. However, letting it sit at room temperature for about 10-15 minutes before serving can enhance the creaminess of the cheesecake.
- Slicing Tips: To achieve clean, professional-looking slices, use a sharp knife dipped in hot water before each cut. Wipe the blade clean between slices to prevent any residue from spoiling the next slice.
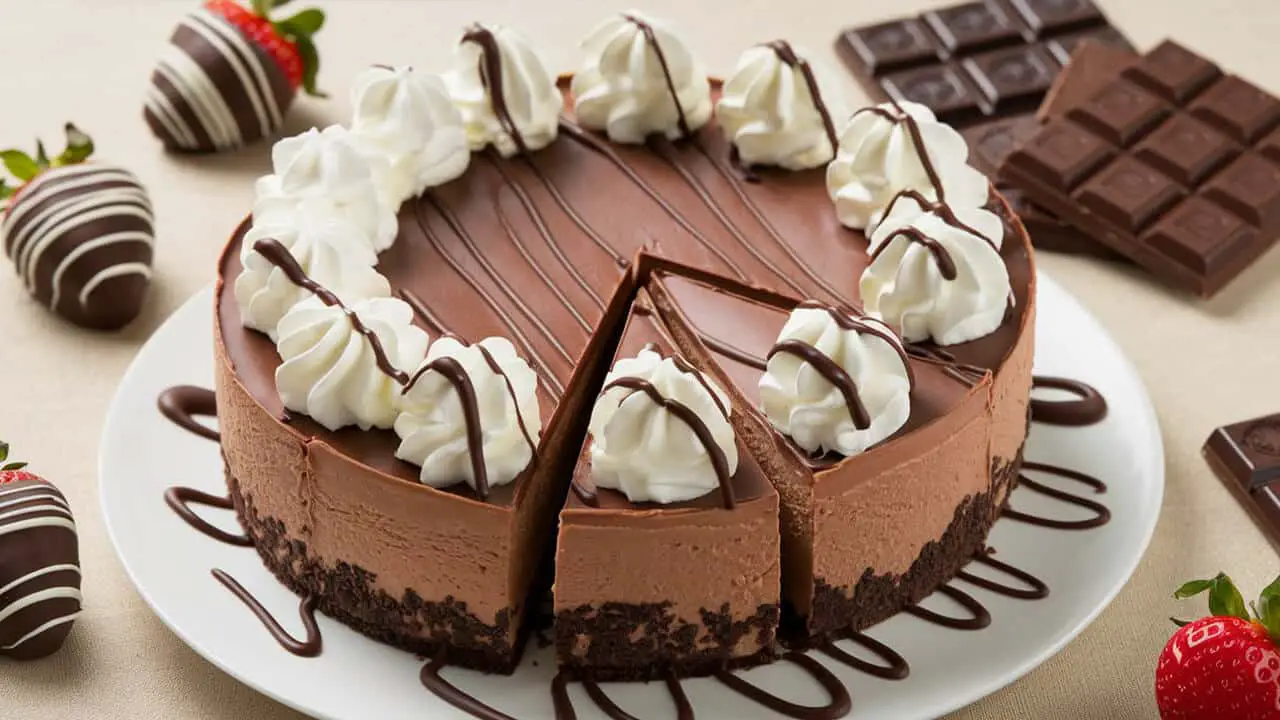
- Garnishing Ideas: Adding a little garnish can elevate the presentation of your cheesecake:
- Whipped Cream: Pipe a swirl of freshly whipped cream on each slice for a classic touch.
- Fresh Berries: Raspberries or strawberries add a pop of color and a tart contrast to the rich chocolate.
- Chocolate Shavings: Use a vegetable peeler to create delicate chocolate curls from a bar of Godiva chocolate.
- Mint Leaves: A few sprigs of fresh mint add a refreshing aroma and a splash of green to your plate.
These simple additions not only enhance the visual appeal but also complement the flavors of the cheesecake, making each bite more delightful.
Proper Storage Techniques
Storing your Godiva Chocolate Cheesecake correctly is crucial to maintaining its flavor and texture, especially if you plan to enjoy it over several days.
- Refrigeration: The cheesecake should be stored in the refrigerator, where it can remain fresh for up to a week. Cover it with plastic wrap or place it in an airtight container to prevent it from absorbing any odors from other foods.
- Freezing for Longer Storage: If you need to store the cheesecake for a longer period, freezing is an excellent option. To freeze:
- Wrap the cheesecake (whole or individual slices) tightly in plastic wrap.
- Follow with a layer of aluminum foil for added protection against freezer burn.
- Label the package with the date and contents.
- The cheesecake can be frozen for up to six months.
- Thawing Instructions: When you’re ready to enjoy your frozen cheesecake, transfer it to the refrigerator to thaw overnight. Avoid thawing it at room temperature, as this can cause condensation, leading to a soggy texture.
- Serving Leftovers: After thawing, the cheesecake should be served within two days for the best taste and texture. If you’ve frozen individual slices, they can be thawed as needed and served immediately after reaching the desired consistency.