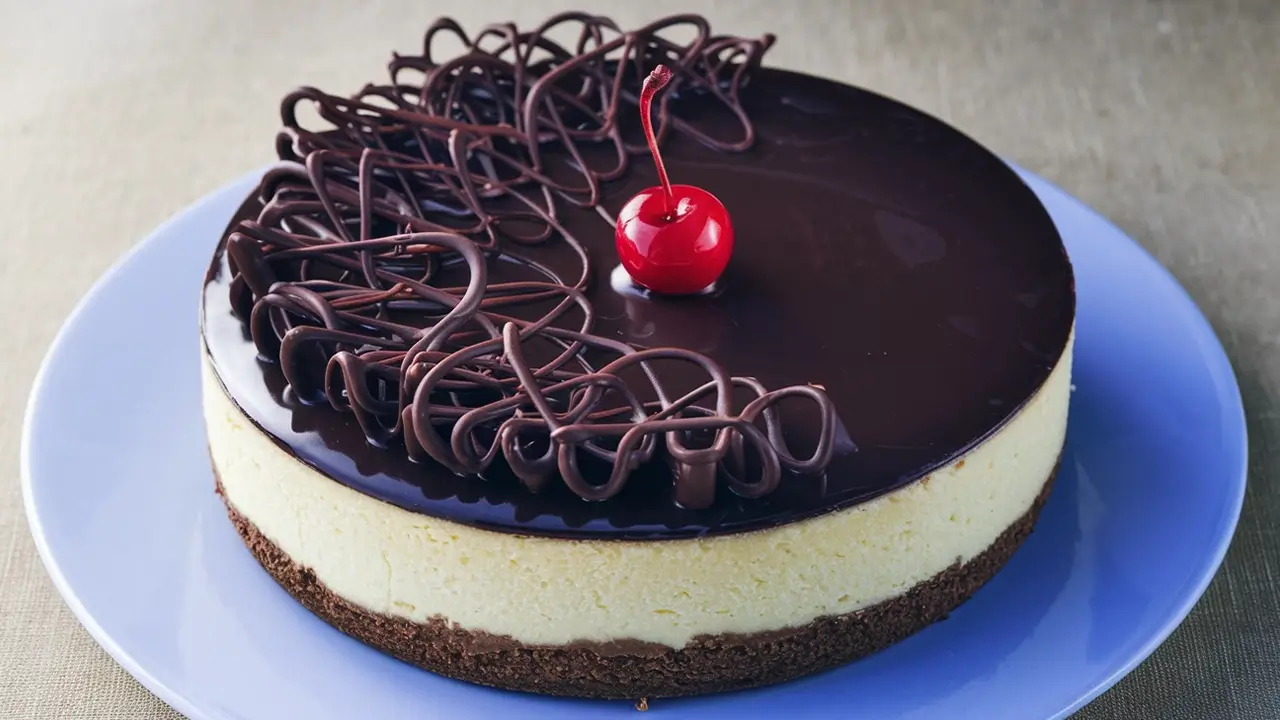
Imagine sinking your fork into a dessert so decadent, it feels like a celebration in every bite. Tuxedo Cheesecake is that dessert—layered with rich dark chocolate and smooth white chocolate, all sitting on a crunchy Oreo crust. This cheesecake is a visual and culinary masterpiece, perfect for any special occasion.
But what exactly makes it so special? Let’s dive into the details of this elegant dessert, exploring its unique layers and understanding why it’s called “Tuxedo.”
The Layers of Tuxedo Cheesecake
Tuxedo Cheesecake is all about the layers, each contributing to its sophisticated look and taste. First, there’s the dark chocolate cheesecake layer. This layer is dense, with a bittersweet flavor that balances the sweetness of the white chocolate. Next comes the white chocolate cheesecake layer—lighter, creamier, and a beautiful contrast to the dark chocolate. Together, these layers create a harmonious blend that melts in your mouth.
Finally, let’s not forget the foundation of it all—the Oreo crust. This isn’t just any crust; it’s a crunchy, chocolatey base that holds the entire cheesecake together. The slightly salty flavor of the Oreo crust contrasts beautifully with the sweet, rich layers above, adding that perfect crunch with every bite.
Why the Name “Tuxedo”?
The name Tuxedo Cheesecake is no accident. Just like a tuxedo, this dessert is a picture of elegance. The alternating layers of dark and white chocolate are reminiscent of a classic black-and-white tuxedo, exuding sophistication. But it’s not just about looks—this cheesecake tastes as luxurious as it looks. Whether you’re serving it at a wedding, a holiday dinner, or just indulging on a quiet evening at home, this dessert will make you feel like you’re at a black-tie event.
Tuxedo Cheesecake: Ingredients and Equipment Needed
Now that you know what makes Tuxedo Cheesecake so special, let’s talk about what you need to make it. Baking this elegant dessert requires not just the right ingredients, but also the right tools. With everything prepared, you’ll be well on your way to creating a masterpiece.
Key Ingredients
Creating a perfect Tuxedo Cheesecake starts with high-quality ingredients. Here’s what you’ll need:
- Oreo Cookies: These are the key to the cheesecake’s crunchy base. Make sure to use the whole cookie, cream and all, for that signature flavor.
- Cream Cheese: Full-fat cream cheese is essential. It gives the cheesecake its rich, creamy texture. Don’t skimp here—low-fat alternatives just won’t cut it.
- Bittersweet and White Chocolate: Quality matters when it comes to chocolate. Bittersweet chocolate offers a deep, rich flavor that balances the sweetness of the white chocolate. Opt for chocolate bars over chips, as they melt more smoothly.
- Heavy Cream: This is used in both the cheesecake filling and the chocolate ganache. It adds a velvety texture and richness that makes each bite luxurious.
- Granulated Sugar: This sweetens the cheesecake just enough without overpowering the delicate flavors of the chocolate layers.
- Vanilla Extract: A little vanilla brings out the flavors of the cream cheese and chocolate, adding depth to the cheesecake.
Essential Equipment
Having the right equipment is just as important as using the right ingredients. Here’s a rundown of what you’ll need:
- Springform Pan: This is non-negotiable for making Tuxedo Cheesecake. The removable sides make it easy to release the cheesecake without damaging those beautiful layers.
- Mixing Tools: A stand mixer or a good-quality hand mixer is essential for blending the cream cheese to a smooth consistency. You’ll also need a few mixing bowls and a spatula for scraping down the sides.
- Food Processor: To get that Oreo crust just right, you’ll need to crush the cookies into fine crumbs.
- Double Boiler: Melting chocolate can be tricky, and a double boiler helps ensure it melts evenly without burning. If you don’t have one, you can create a makeshift version with a heatproof bowl over a pot of simmering water.
- Water Bath Setup: Baking a cheesecake in a water bath helps prevent cracks by creating a moist environment. This involves wrapping the springform pan in foil and placing it in a larger roasting pan filled with hot water.
But before you dive in, let’s go through the step-by-step recipe to ensure you get every detail just right. Stay tuned for the full recipe in the next part!
Step-by-Step Recipe
It’s time to bring everything together and create your very own Tuxedo Cheesecake. This step-by-step guide will walk you through the process, ensuring you get those layers just right and end up with a dessert that’s as stunning as it is delicious.
Preparing the Oreo Crust
Let’s start with the foundation of our Tuxedo Cheesecake—the Oreo crust. This step is quick, but it sets the stage for everything that follows.
- Crush the Oreos: Place the Oreo cookies in a food processor and pulse until they turn into fine crumbs. Alternatively, you can place them in a zip-top bag and crush them with a rolling pin, but the food processor is quicker and ensures a more even texture.
- Mix with Butter: Transfer the Oreo crumbs to a bowl and add melted butter. Stir until the crumbs are evenly coated and resemble wet sand.
- Press into the Pan: Pour the crumb mixture into a 9-inch springform pan. Use the bottom of a glass or the back of a spoon to press the crumbs firmly into the bottom and slightly up the sides of the pan. This helps to create a sturdy crust that will hold the layers of cheesecake.
- Bake the Crust: Preheat your oven to 350°F (175°C) and bake the crust for about 10 minutes. This step helps set the crust, so it doesn’t get soggy when you add the cheesecake layers. After baking, let the crust cool on a wire rack while you prepare the fillings.
Making the Dark Chocolate Cheesecake Layer
Now, let’s move on to the first of the cheesecake layers—the rich and velvety dark chocolate layer.
- Melt the Chocolate: In a double boiler (or a heatproof bowl set over simmering water), melt the bittersweet chocolate until smooth. Stir continuously to avoid burning the chocolate. Once melted, set it aside to cool slightly.
- Prepare the Cheesecake Batter: In a large mixing bowl, beat the cream cheese until smooth and creamy, using a stand mixer or hand mixer. Gradually add the granulated sugar, and continue beating until fully incorporated.
- Add Eggs and Chocolate: Add the eggs one at a time, beating on low speed after each addition just until blended. Overbeating can introduce too much air into the batter, leading to cracks. Finally, gently fold in the melted chocolate until the mixture is uniformly dark and luscious.
- Pour and Bake: Pour the dark chocolate cheesecake mixture over the cooled Oreo crust, smoothing the top with a spatula. Bake at 325°F (160°C) for 50-60 minutes, or until the center is almost set but still slightly jiggly.
Making the White Chocolate Cheesecake Layer
Next up is the creamy white chocolate layer that adds a beautiful contrast to the dark chocolate.
- Melt the White Chocolate: Using the same method as before, melt the white chocolate in a double boiler. Stir continuously until smooth and set aside to cool.
- Prepare the White Chocolate Batter: In a clean mixing bowl, beat the cream cheese until smooth. Add the granulated sugar and beat until well combined. Mix in the vanilla extract and a bit of heavy cream to add some extra richness.
- Incorporate the White Chocolate: Slowly add the melted white chocolate to the cream cheese mixture, beating on low speed until fully blended. As with the dark chocolate layer, add eggs one at a time, beating until just combined.
- Layer and Bake: Pour the white chocolate cheesecake mixture gently over the dark chocolate layer. Smooth the top and return the pan to the water bath. Bake for another 50-60 minutes, until the edges are set and the center still jiggles slightly when shaken.
Preparing the Chocolate Ganache Topping
The final touch is a smooth, glossy chocolate ganache that ties everything together.
- Heat the Cream: In a small saucepan, warm the heavy cream over medium heat until it starts to simmer. Do not let it boil.
- Melt the Chocolate: Place chopped bittersweet chocolate in a heatproof bowl. Pour the hot cream over the chocolate and let it sit for a few minutes. Then, stir until the mixture is smooth and shiny.
- Add the Ganache: Allow the ganache to cool slightly before pouring it over the cooled cheesecake. Use a spatula to spread it evenly, letting it drip down the sides for a dramatic effect.
- Decorate with White Chocolate Swirls: Melt a small amount of white chocolate, drizzle it over the ganache, and use a toothpick to create swirls. This step is where your creativity can shine!
Assembling and Baking the Cheesecake
With all the layers prepared, it’s time to bring your Tuxedo Cheesecake together.
- Layering: After baking the dark chocolate layer, allow it to cool slightly before adding the white chocolate layer. This helps the layers to remain distinct, giving the cheesecake its signature tuxedo appearance.
- Final Bake: Once both layers are added, bake the cheesecake until set, using the same water bath method. This will help prevent cracks and ensure an even texture throughout.
- Cooling: Turn off the oven and crack the door open. Allow the cheesecake to cool in the oven for approximately an hour. This gradual cooling process prevents cracks on the surface. Then, transfer the cheesecake to a wire rack and let it cool completely before refrigerating for at least 4 hours, or preferably overnight.
Final Touches and Serving Suggestions
You’ve done it! The layers are set, the ganache is glossy, and your kitchen smells divine. But before you dive in, let’s talk presentation.
- Decorate with Chocolate Curls: Use a vegetable peeler to create chocolate curls from a block of chocolate, and scatter them over the top of the cheesecake. It’s a simple touch that adds a lot of visual appeal.
- Serve with Fresh Berries: While the cheesecake is stunning on its own, adding a few fresh raspberries or strawberries on the side can provide a burst of color and a tangy contrast to the rich flavors.
- Cut with a Hot Knife: To get clean slices, dip your knife in hot water, wipe it dry, and then make your cut. This prevents the layers from smearing together.
Tips for Perfecting Your Tuxedo Cheesecake
Creating a flawless Tuxedo Cheesecake is an art, and like any art, it requires some insider knowledge. Whether you’re a first-time cheesecake baker or a seasoned pro, these tips will help you avoid common pitfalls and elevate your dessert to the next level.
Avoiding Cracks in the Cheesecake
One of the most frustrating things that can happen when baking a cheesecake is discovering a crack on the surface. But don’t worry—there are several ways to prevent this:
- Use a Water Bath: As we mentioned earlier, baking your cheesecake in a water bath creates a moist environment that prevents the cheesecake from drying out and cracking. Make sure to wrap your springform pan tightly in foil to prevent water from seeping in.
- Avoid Overbeating the Batter: When you mix the cheesecake batter, especially after adding the eggs, mix on low speed and stop as soon as everything is combined. Overbeating can incorporate too much air into the batter, which expands during baking and contracts as it cools, leading to cracks.
- Gradual Cooling: Sudden changes in temperature can cause the cheesecake to crack. Once the baking time is up, turn off the oven and let the cheesecake cool inside with the door slightly open for about an hour. This gradual cooling process helps the cheesecake set without cracking.
- Room-Temperature Ingredients: Ensure that all your ingredients, particularly the cream cheese and eggs, are at room temperature before you start mixing. This allows them to blend together more smoothly, reducing the risk of lumps and cracks.
Getting the Perfect Ganache
A smooth, glossy ganache is the crowning glory of a Tuxedo Cheesecake, but achieving that perfect finish can be tricky. Here’s how to get it right:
- Chop the Chocolate Finely: The smaller the pieces, the faster and more evenly the chocolate will melt when you pour the hot cream over it.
- Use Heavy Cream: Don’t substitute with milk or a lower-fat cream, as the fat content in heavy cream is what gives ganache its luxurious texture.
- Let It Cool Slightly Before Pouring: After mixing the ganache, let it cool for a few minutes until it thickens slightly. This will make it easier to control when spreading over the cheesecake, and it will prevent it from running too thin.
- Smooth with a Spatula: To get a perfectly smooth finish, use an offset spatula to spread the ganache. Work quickly but gently, smoothing the ganache over the surface and down the sides of the cheesecake.
Storing and Freezing Tips
Cheesecake is one of those desserts that can be made ahead of time, making it perfect for parties or special occasions. Here’s how to store it properly:
- Refrigeration: After your cheesecake has cooled completely, cover it loosely with plastic wrap and refrigerate for at least 4 hours, but preferably overnight. This allows the flavors to meld together and gives the cheesecake that perfect, dense texture.
- Freezing: Tuxedo Cheesecake freezes beautifully, making it an ideal make-ahead dessert. To freeze, first cool the cheesecake completely. Afterward, wrap the cheesecake tightly in plastic wrap, followed by a layer of aluminum foil. It can be frozen for up to 2 months. To serve, thaw it overnight in the refrigerator.
- Slicing: For clean slices, use a sharp knife dipped in hot water and wiped dry before each cut. This prevents the knife from sticking and gives you neat, professional-looking slices.
By now, you’re well on your way to mastering the art of Tuxedo Cheesecake. But what if you want to put your own spin on this classic dessert? In the next part, we’ll explore some exciting variations you can try. Ready to get creative? Let’s dive in!
Variations of Tuxedo Cheesecake
While the classic Tuxedo Cheesecake is already a showstopper, sometimes it’s fun to mix things up and put a unique twist on a beloved recipe. Here are a few exciting variations that will allow you to get creative while still maintaining the elegant appeal of this dessert.
Raspberry Tuxedo Cheesecake
Adding raspberries to your Tuxedo Cheesecake introduces a burst of fruity freshness that perfectly complements the richness of the chocolate layers. Here’s how you can incorporate raspberries:
- Raspberry Layer: Before pouring the white chocolate layer, spread a thin layer of raspberry preserves or fresh raspberry puree over the dark chocolate cheesecake. This adds a tart contrast that balances the sweetness of the cheesecake.
- Raspberry Garnish: Top the cheesecake with fresh raspberries for a beautiful and delicious garnish. You can arrange them in a pattern on top of the ganache or scatter them around the edge.
- Raspberry Swirl: For a more integrated flavor, swirl raspberry puree into the white chocolate cheesecake layer before baking. This creates a marbled effect that’s as visually appealing as it is tasty.
No-Bake Tuxedo Cheesecake
For those days when you want the indulgence of a Tuxedo Cheesecake without turning on the oven, a no-bake version is the way to go. Here’s how to make it:
- No-Bake Oreo Crust: Instead of baking the Oreo crust, simply press it into the pan and let it chill in the refrigerator until firm.
- No-Bake Cheesecake Layers: Replace the baked cheesecake layers with a no-bake filling made from cream cheese, whipped cream, and melted chocolate. Mix the ingredients until smooth, then layer as usual.
- Set in the Fridge: After layering, let the cheesecake set in the refrigerator for at least 4 hours, or until firm. This version has a slightly lighter texture but still delivers on flavor.
Mini Tuxedo Cheesecakes
Mini cheesecakes are perfect for parties, giving each guest their own personal dessert. They’re also great for portion control! Here’s how to make them:
- Use a Muffin Tin: Instead of a large springform pan, use a muffin tin lined with cupcake liners. This will give you individual servings of cheesecake.
- Layer and Bake: Prepare the cheesecake layers as usual, but divide the ingredients among the muffin cups. Bake at a slightly lower temperature (about 300°F) for 20-25 minutes, or until the centers are set.
- Decorate Individually: Top each mini cheesecake with a dollop of ganache and a single chocolate curl or berry. This makes for an elegant presentation that’s easy to serve.
Each of these variations offers a fresh take on the classic Tuxedo Cheesecake, allowing you to experiment with new flavors and presentations. Whether you’re adding a fruity twist, simplifying the process with a no-bake version, or creating adorable mini cheesecakes, these ideas are sure to impress
Now that you’ve explored some creative variations, you might have a few questions about Tuxedo Cheesecake. Don’t worry—we’ve got answers! Let’s move on to the FAQs in the next part. Ready to satisfy your curiosity? Keep reading!
FAQs About Tuxedo Cheesecake
Curious about how to perfect your Tuxedo Cheesecake or want to know how to make it ahead of time? You’re not alone! Here are some frequently asked questions that can help you master this decadent dessert.
How Long Does Tuxedo Cheesecake Last?
Tuxedo Cheesecake can be stored in the refrigerator for up to 5 days. To keep it fresh, cover the cheesecake with plastic wrap or place it in an airtight container. If you’ve topped it with ganache, the ganache may firm up, but a quick 10-minute rest at room temperature before serving will soften it up nicely.
For longer storage, you can freeze the cheesecake. Wrap it tightly in plastic wrap, followed by a layer of aluminum foil, and freeze for up to 2 months. When you’re ready to enjoy it, thaw the cheesecake in the refrigerator overnight. This method preserves the texture and flavor, making it a great option for make-ahead desserts.
Can I Make Tuxedo Cheesecake Ahead of Time?
Absolutely! In fact, making Tuxedo Cheesecake a day or two in advance can enhance the flavor as the layers have more time to meld together. After baking and cooling the cheesecake, simply cover it and store it in the refrigerator until you’re ready to serve. This also makes it a convenient dessert option for parties or special occasions since you can focus on other dishes on the day of the event.
If you’re preparing the cheesecake more than two days in advance, freezing is your best option. Follow the freezing instructions mentioned earlier to keep it fresh and delicious.
What If I Don’t Have a Springform Pan?
No springform pan? No problem! While a springform pan is ideal for Tuxedo Cheesecake due to its removable sides, you can still make this dessert with a few adjustments:
- Use a Regular Cake Pan: If you use a regular 9-inch cake pan, line it with parchment paper, allowing the paper to hang over the edges. This way, you can lift the cheesecake out once it’s set. Make sure to grease the sides well to prevent sticking.
- Adjust the Serving Style: Without a springform pan, it might be harder to get those perfect slices. Instead, consider serving the cheesecake directly from the pan, cutting it into squares or wedges like a traditional cake.
How Do I Prevent My Cheesecake from Cracking?
Cracks can be a common issue with cheesecakes, but following a few key tips can help you avoid them:
- Use a Water Bath: Baking your cheesecake in a water bath (also known as a bain-marie) creates a humid environment that helps the cheesecake bake evenly, reducing the risk of cracks.
- Don’t Overbake: Overbaking is one of the most common causes of cracks. Your cheesecake should be set around the edges but still have a slight jiggle in the center when you gently shake the pan. The residual heat will continue to cook the cheesecake as it cools, setting the center perfectly.
- Gradual Cooling: Letting the cheesecake cool in the oven with the door slightly open allows it to cool gradually, which helps prevent the top from cracking due to a sudden temperature change.